How to Connect Fastcruise to Your Self-Hosted TeslaMate — Setup Guide
Step-by-step guide to connect Fastcruise to your self-hosted TeslaMate using TeslaMateApi. Private Tesla analytics on iOS, zero data collection.
If you’re running TeslaMate, you already know it’s the gold standard for Tesla data logging. But let’s be honest: checking your charging stats or drive history via a mobile web browser or a dense Grafana dashboard while on the go isn't exactly a 'premium' experience. Most Tesla owners turn to subscription-based apps to get a clean mobile interface, but that usually means handing over your private data to a third-party server—and paying a monthly fee for the privilege. Enter Fastcruise — a native iOS app, compatible with TeslaMate, that connects directly to your self-hosted instance. In this guide, I’ll show you how to set up Fastcruise so you can ditch the subscriptions, keep your data private, and finally get those beautiful Tesla analytics right on your home screen.
Prerequisites Checklist
- A running instance of TeslaMate
- The Fastcruise app installed on your iOS device (download from the App Store)
Step-by-Step: Configuring TeslaMateApi for Fastcruise
While TeslaMate is an incredible data logger, it has one major limitation: it lacks a built-in interface for external apps to access your data. By default, TeslaMate writes your car's data into a database and uses Grafana to show you charts. However, it doesn't provide a "door" (an API) for a native iOS app like Fastcruise to pull that information. TeslaMateApi acts as the bridge, it reads your private database and converts the raw data into a format (JSON) that Fastcruise can understand.
The Core Setup: Configuring TeslaMateApi
If you have followed the official TeslaMate installation guide here, your docker-compose.yaml file looks something like this:
services:
  teslamate:
    image: teslamate/teslamate:latest
    restart: always
    environment:
      - ENCRYPTION_KEY=secretkey #replace with a secure key to encrypt your Tesla API tokens
      - DATABASE_USER=teslamate
      - DATABASE_PASS=password #insert your secure database password!
      - DATABASE_NAME=teslamate
      - DATABASE_HOST=database
      - MQTT_HOST=mosquitto
    ports:
      - 4000:4000
    volumes:
      - ./import:/opt/app/import
    cap_drop:
      - all
  database:
    image: postgres:18-trixie
    restart: always
    environment:
      - POSTGRES_USER=teslamate
      - POSTGRES_PASSWORD=password #insert your secure database password!
      - POSTGRES_DB=teslamate
    volumes:
      - teslamate-db:/var/lib/postgresql
  grafana:
    image: teslamate/grafana:latest
    restart: always
    environment:
      - DATABASE_USER=teslamate
      - DATABASE_PASS=password #insert your secure database password!
      - DATABASE_NAME=teslamate
      - DATABASE_HOST=database
    ports:
      - 3000:3000
    volumes:
      - teslamate-grafana-data:/var/lib/grafana
  mosquitto:
    image: eclipse-mosquitto:2
    restart: always
    command: mosquitto -c /mosquitto-no-auth.conf
    # ports:
    #   - 1883:1883
    volumes:
      - mosquitto-conf:/mosquitto/config
      - mosquitto-data:/mosquitto/data
volumes:
  teslamate-db:
  teslamate-grafana-data:
  mosquitto-conf:
  mosquitto-data:
Each service in this docker-compose.yml file handles a specific task: teslamate fetches the data, database stores it, and grafana visualizes it. To get Fastcruise working, we are simply going to add one more service to this list TeslaMateApi to act as the data bridge for your iPhone.
Now let’s add the TeslaMateApi service to your existing docker-compose.yml file:
  teslamateapi:
    image: tobiasehlert/teslamateapi:latest
    restart: always
    depends_on:
      - database
    environment:
      - ENCRYPTION_KEY=MySuperSecretEncryptionKey
      - DATABASE_USER=teslamate
      - DATABASE_PASS=secret
      - DATABASE_NAME=teslamate
      - DATABASE_HOST=database
      - MQTT_HOST=mosquitto
      - TZ=Europe/Berlin
    ports:
      - 8080:8080
The following environment variables need to be set:
ENCRYPTION_KEY: This should match the encryption key used in your TeslaMate service.DATABASE_USER,DATABASE_PASS,DATABASE_NAME,DATABASE_HOST: These should match the database credentials used in your TeslaMate service.MQTT_HOST: This should match the MQTT host used in your TeslaMate service.TZ: Set this to your local timezone (e.g.,America/Los_Angeles). See here for a list of valid timezones.
Important
Take time to ensure that all environment variables are correctly set, especially the database credentials and encryption key. Mismatched settings will prevent TeslaMateApi from connecting to your database, leading to errors when Fastcruise tries to fetch data.
The whole docker-compose.yml file should now look like this:
services:
  teslamate:
    image: teslamate/teslamate:latest
    restart: always
    environment:
      - ENCRYPTION_KEY=secretkey #replace with a secure key to encrypt your Tesla API tokens
      - DATABASE_USER=teslamate
      - DATABASE_PASS=password #insert your secure database password!
      - DATABASE_NAME=teslamate
      - DATABASE_HOST=database
      - MQTT_HOST=mosquitto
    ports:
      - 4000:4000
    volumes:
      - ./import:/opt/app/import
    cap_drop:
      - all
  database:
    image: postgres:18-trixie
    restart: always
    environment:
      - POSTGRES_USER=teslamate
      - POSTGRES_PASSWORD=password #insert your secure database password!
      - POSTGRES_DB=teslamate
    volumes:
      - teslamate-db:/var/lib/postgresql
  grafana:
    image: teslamate/grafana:latest
    restart: always
    environment:
      - DATABASE_USER=teslamate
      - DATABASE_PASS=password #insert your secure database password!
      - DATABASE_NAME=teslamate
      - DATABASE_HOST=database
    ports:
      - 3000:3000
    volumes:
      - teslamate-grafana-data:/var/lib/grafana
  mosquitto:
    image: eclipse-mosquitto:2
    restart: always
    command: mosquitto -c /mosquitto-no-auth.conf
    # ports:
    #   - 1883:1883
    volumes:
      - mosquitto-conf:/mosquitto/config
      - mosquitto-data:/mosquitto/data
  teslamateapi:
    image: tobiasehlert/teslamateapi:latest
    restart: always
    depends_on:
      - database
    environment:
      - ENCRYPTION_KEY=<YOUR_ENCRYPTION_KEY>
      - DATABASE_USER=teslamate
      - DATABASE_PASS=<YOUR_DATABASE_PASSWORD>
      - DATABASE_NAME=teslamate
      - DATABASE_HOST=database
      - MQTT_HOST=mosquitto
      - TZ=<YOUR_TIMEZONE>
    ports:
      - 8080:8080
volumes:
  teslamate-db:
  teslamate-grafana-data:
  mosquitto-conf:
  mosquitto-data:
Once your file is saved, tell Docker to pull the new image and start the API service.
docker-compose up -dCheck the status of your containers to ensure the new teslamateapi is "Up":
> docker compose ps
NAME                            IMAGE                              COMMAND                  SERVICE        CREATED          STATUS          PORTS
teslamate-test-database-1       postgres:18-trixie                 "docker-entrypoint.s…"   database       56 seconds ago   Up 56 seconds   5432/tcp
teslamate-test-grafana-1        teslamate/grafana:latest           "/run.sh"                grafana        56 seconds ago   Up 56 seconds   0.0.0.0:3000->3000/tcp, [::]:3000->3000/tcp
teslamate-test-mosquitto-1      eclipse-mosquitto:2                "/docker-entrypoint.…"   mosquitto      56 seconds ago   Up 56 seconds   1883/tcp
teslamate-test-teslamate-1      teslamate/teslamate:latest         "tini -- /bin/dash /…"   teslamate      56 seconds ago   Up 56 seconds   0.0.0.0:4000->4000/tcp, [::]:4000->4000/tcp
teslamate-test-teslamateapi-1   tobiasehlert/teslamateapi:latest   "./app"                  teslamateapi   56 seconds ago   Up 55 seconds   0.0.0.0:8080->8080/tcp, [::]:8080->8080/tcp
Verifying TeslaMateApi is Working
Now let's check if we can fetch data from the TeslaMateApi. Open your web browser and navigate to:
http://<YOUR_SERVER_IP>:8080/api/v1/cars
Important
Replace <YOUR_SERVER_IP> with the actual IP address or hostname of the server where TeslaMate is running.
You should see a JSON response with your car's information, similar to this:
{
  "data": {
    "cars": [
      {
        "car_id": 1,
        "name": "Apollo",
        "car_details": {
          "eid": hahdh,
          "vid": jaidji,
          "vin": "aojsdoja",
          "model": "Y",
          "trim_badging": "74D",
          "efficiency": null
        },
        "car_exterior": {
          "exterior_color": "Quicksilver",
          "spoiler_type": "None",
          "wheel_type": "HelixV220"
        },
        "car_settings": {
          "suspend_min": 21,
          "suspend_after_idle_min": 15,
          "req_not_unlocked": false,
          "free_supercharging": false,
          "use_streaming_api": true
        },
        "teslamate_details": {
          "inserted_at": "2025-12-20T10:09:34+01:00",
          "updated_at": "2025-12-20T10:10:15+01:00"
        },
        "teslamate_stats": {
          "total_charges": 0,
          "total_drives": 0,
          "total_updates": 1
        }
      }
    ]
  }
}
Troubleshooting
If the teslamateapi service shows as Restarting or Exit 1, it usually means it can't talk to your database. You can check the specific error by looking at the logs:
docker-compose logs <service_name>If for example the teslamateapi service is not starting correctly, due to a missconfigured password, it will show an error like this in the logs:
2025/12/20 10:08:50.317921 [error] initDBconnection - database ping error: pq: password authentication failed for user "teslamate"
Securing TeslaMateApi
Warning
Read this section carefully! By default, TeslaMateApi does not implement any authentication or encryption. This means that if you expose the API to the internet without additional security measures, anyone who knows your server's IP and port can access your Tesla data. If you have little IT experience, consider using a VPN to access your home network securely instead of exposing the API directly to the internet.
To keep your Tesla data safe, consider the following security measures:
- Use a Reverse Proxy with HTTPS: Set up a reverse proxy (like Nginx or Traefik) in front of TeslaMateApi to handle HTTPS encryption. This ensures that data transmitted between your iPhone and the API is encrypted.
- Implement Authentication: Use basic authentication with your reverse proxy to restrict access to authorized users only.
- Firewall Rules: Configure your firewall to restrict access to the TeslaMateApi port (8080) to only trusted IP addresses or VPN connections.
- Regular Updates: Keep TeslaMateApi and all related services updated to the latest versions to benefit from security patches and improvements.
Connecting Fastcruise to TeslaMateApi
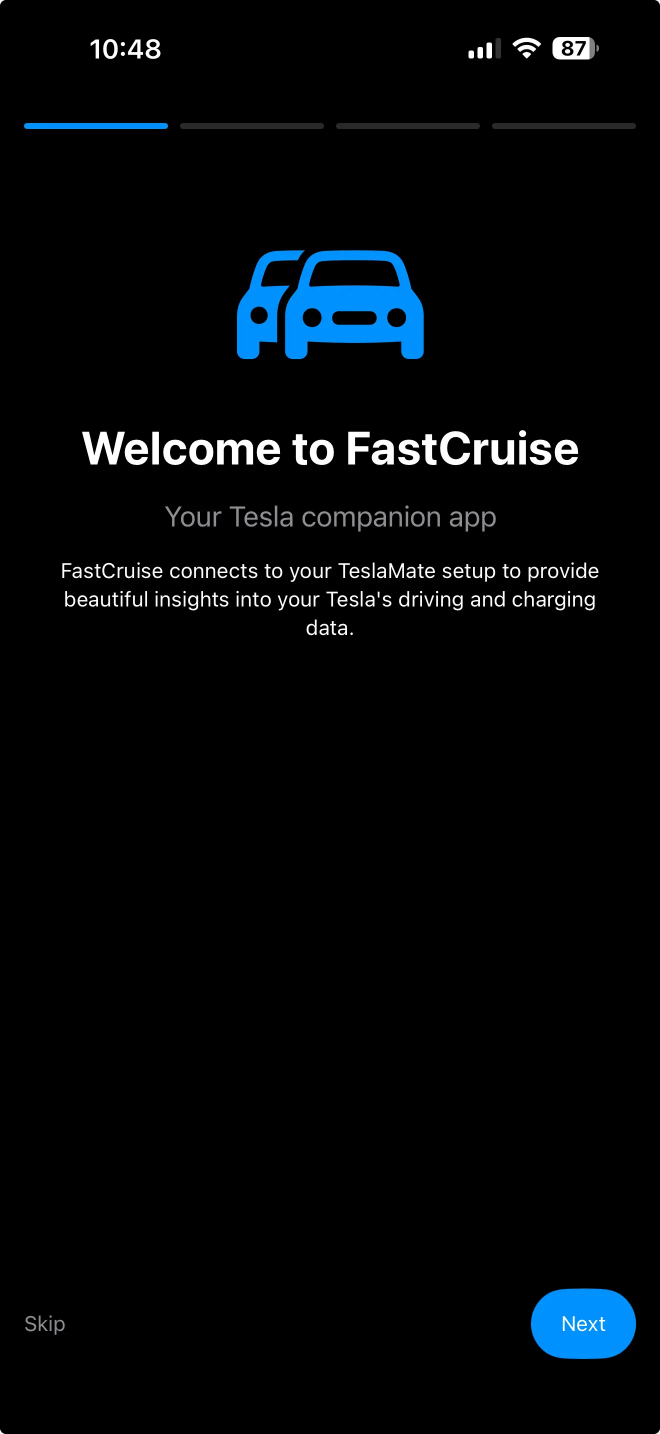
Now that TeslaMateApi is up and running, it’s time to connect Fastcruise on your iOS device.
-
Open the Fastcruise app on your iPhone.
-
When you open Fastcruise for the first time, you'll be prompted with an onboarding screen where you'll need to enter your connection details.
- In the end of the onboarding process, enter the connection details for your TeslaMateApi instance:
- URL:
http://<YOUR_SERVER_IP>:8080(replace<YOUR_SERVER_IP>with your server's IP address or hostname)
- URL:
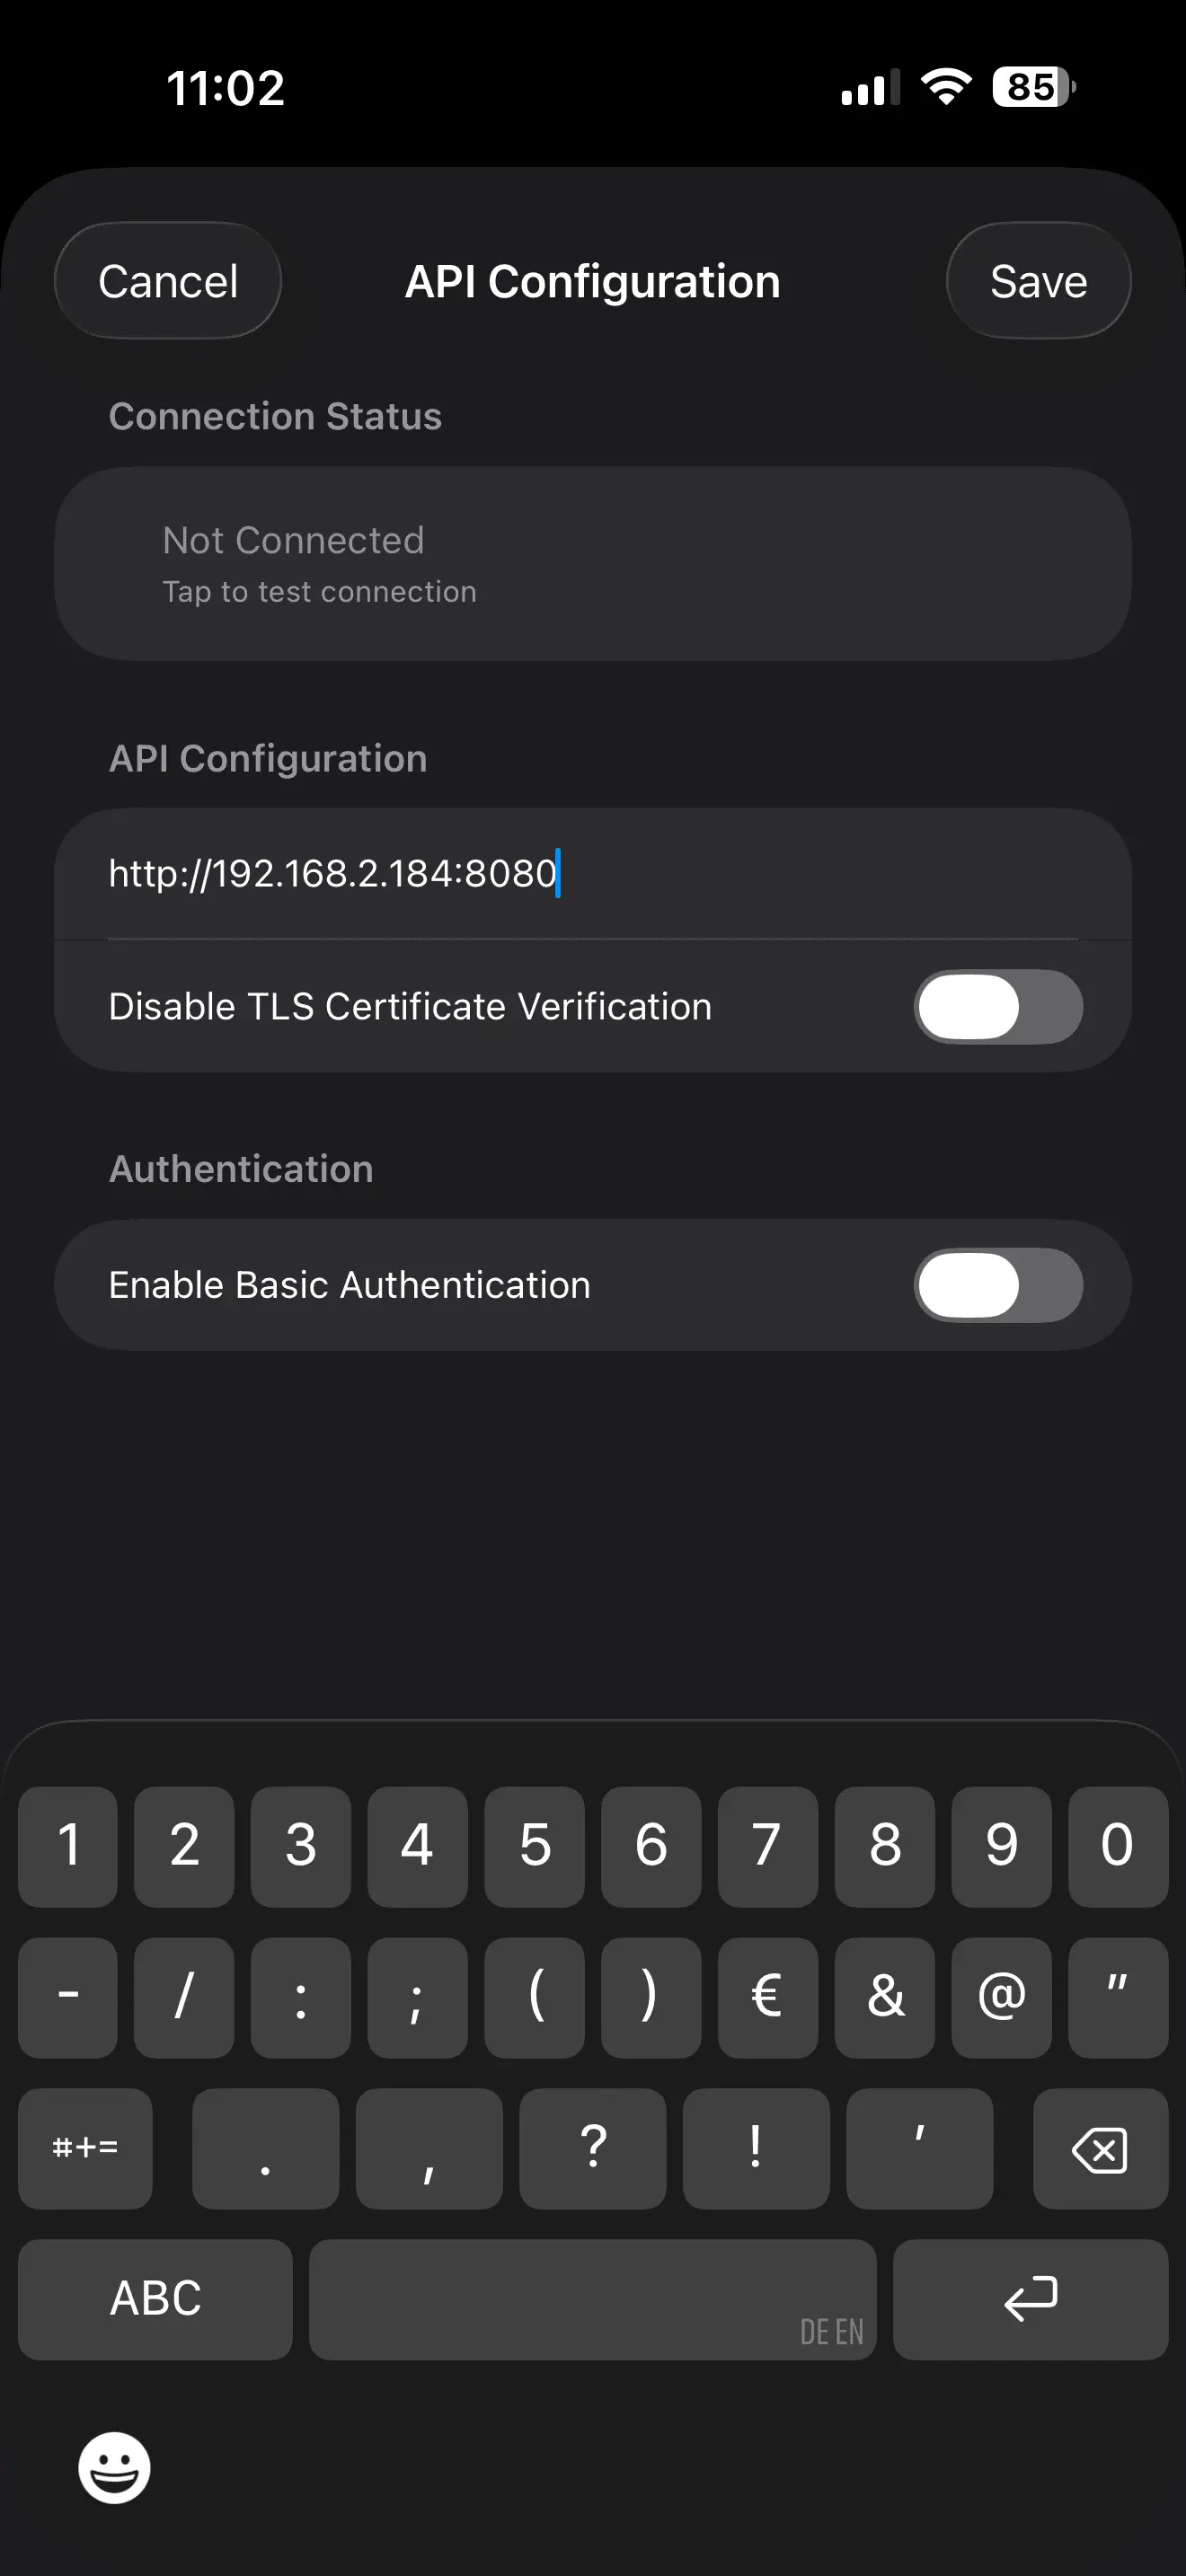
Information
Your iPhone may prompt you to allow Fastcruise to connect to local network devices. This is necessary for Fastcruise to communicate with your TeslaMateApi instance, so be sure to allow it. The connection may fail initially. Tap on the Connection Status box to retry the connection until it succeeds.
Now Click Save and Fastcruise should connect to your TeslaMateApi instance and start fetching your Tesla data!
If you head to the home screen, you should see the following dashboard with your car's status:
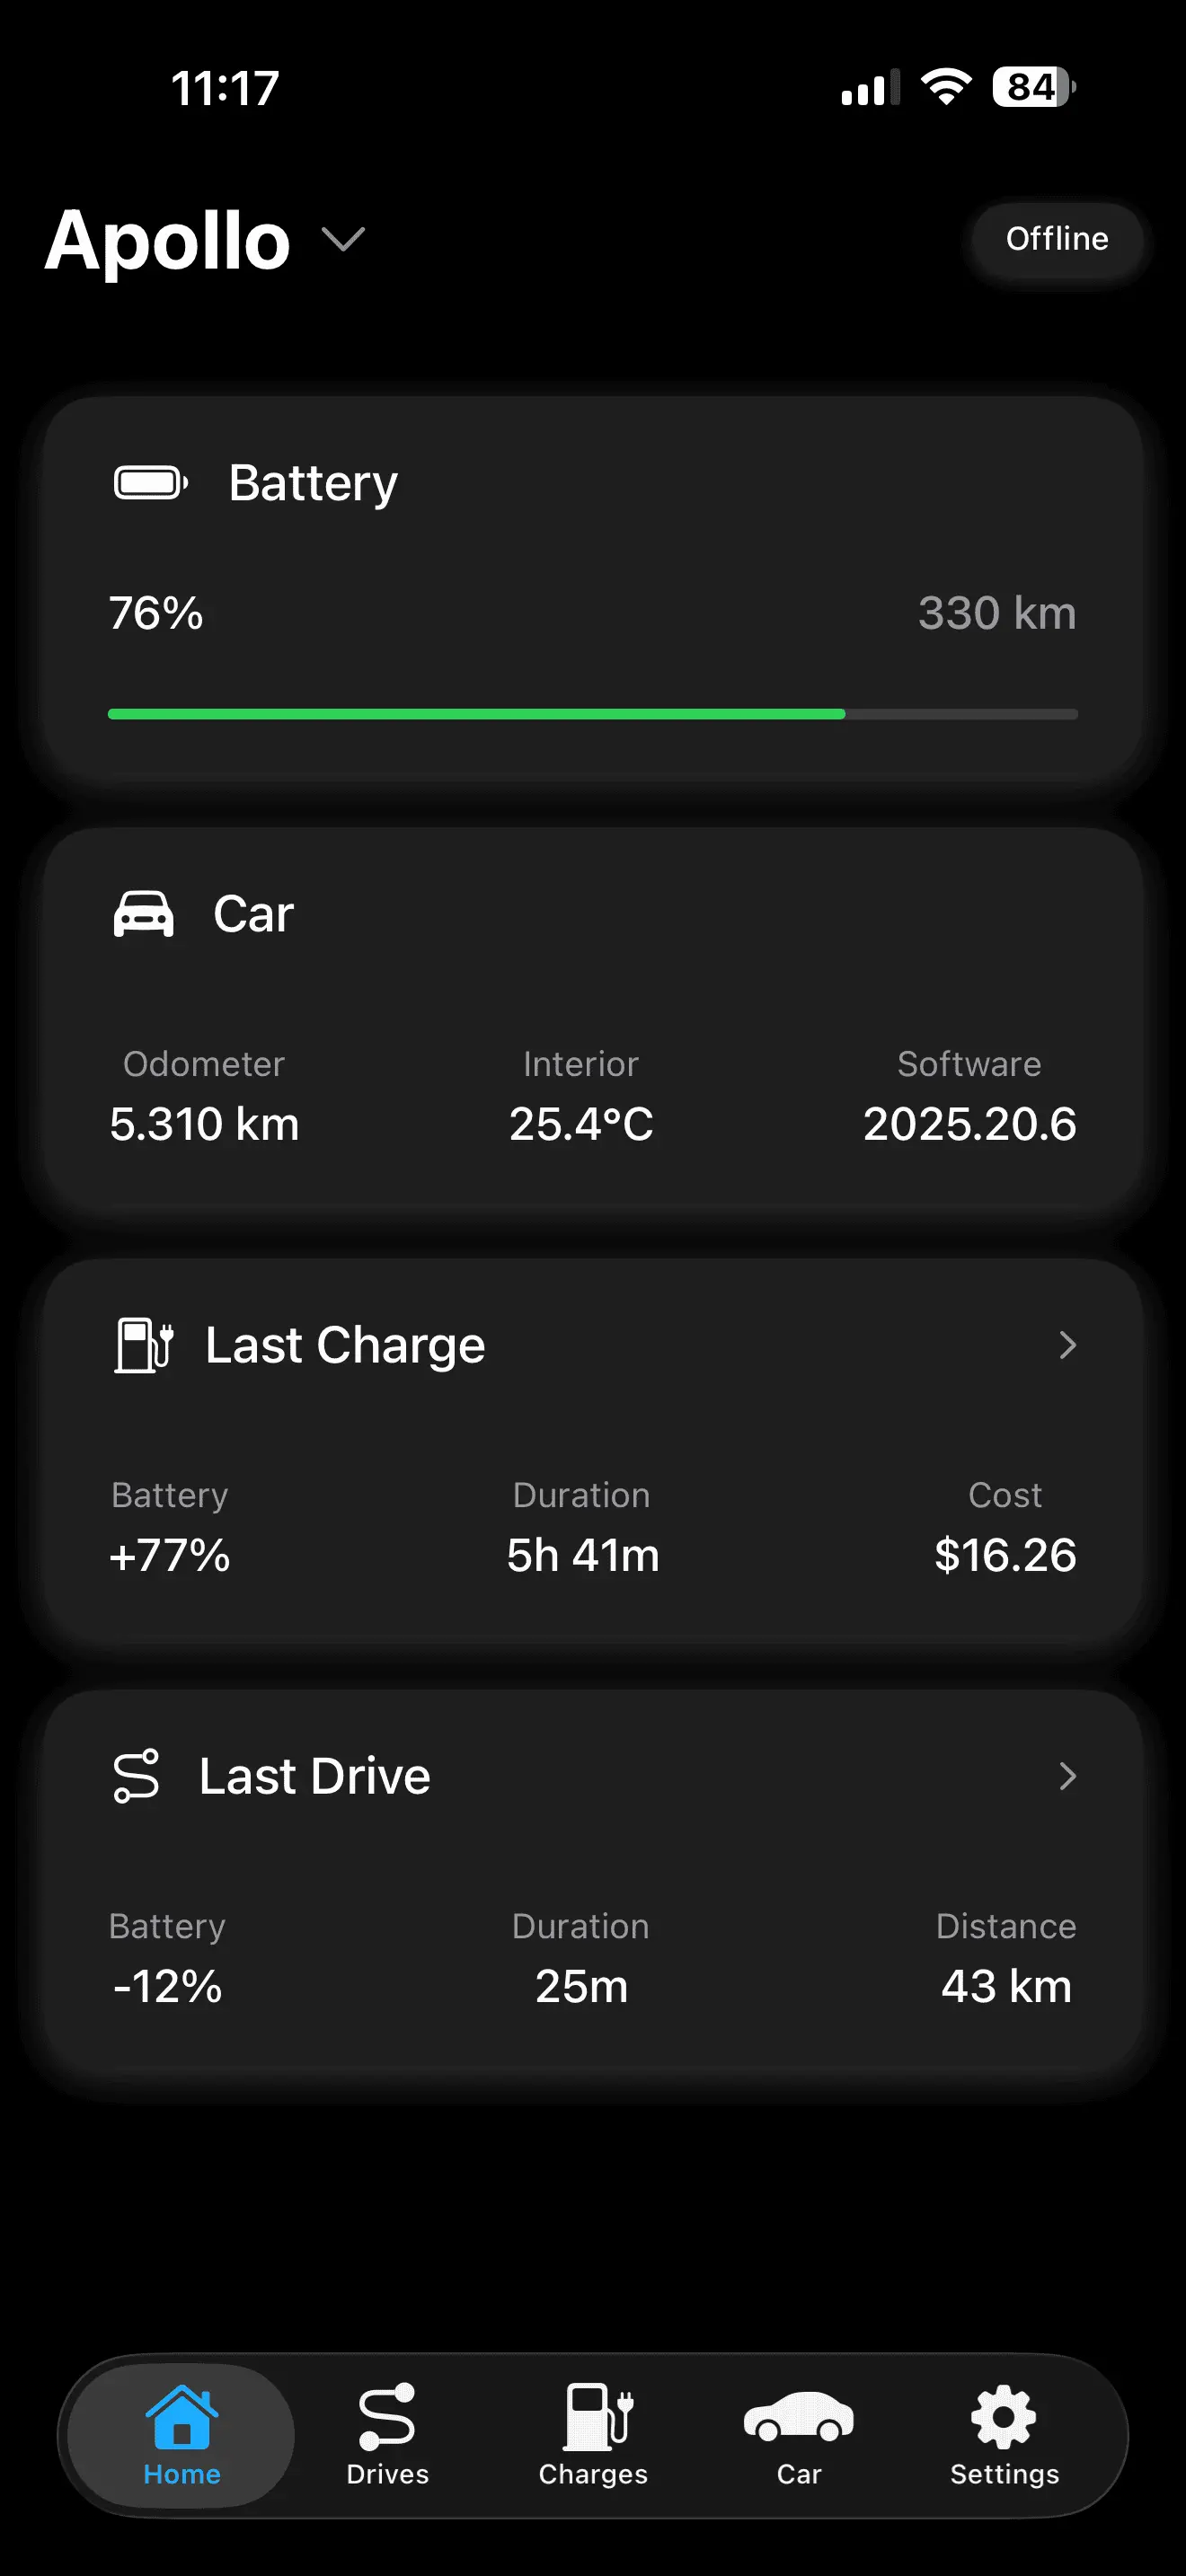
Note
First-time Sync: If you just installed TeslaMate and TeslaMateApi, you may see limited data initially. Historical drives and charging sessions will only appear once your Tesla has completed new trips or charges for the logger to capture.
Next Steps: Widgets & Customization
Congratulations! Your Tesla data is now officially in your pocket.
- iOS Widgets: Don't forget to long-press your home screen to add Fastcruise widgets. They offer a quick glance at your range and status without opening the app.
- Change the currency unit in Fastcruise settings to match your local preferences.
- Privacy First: Remember, because this is self-hosted, your data never touches a third-party server.
Did this guide help you? Share your experience or ask questions by sending an email to [email protected]
Fastcruise is an unofficial community tool and is not affiliated with, endorsed by, or supported by the official TeslaMate project.